Material Testing
Material testing
Mechanical testing have been designed to test several weld properties.Few other material testing techniques are
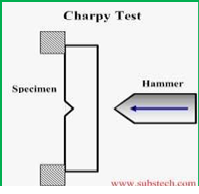
Charpy V-Notch Toughness:
Notch toughness is the capacity that a material possesses to absorb energy in the presence of a flaw, such as a notch or crack. The material will likely exhibit a lower level of toughness.
When a flaw is present in a material, loading induces a triaxial tension stres s state adjacent to the flaw. The material develops plastic strains as the yield stress is exceeded, near the crack tip.
Notch-toughness is measured with a variety of specimens such as the Charpy V-notch impact specimen or the dynamic tear test specimen. As with regular impact testing the tests are often repeated numerous times with specimens tested at a different temperature.
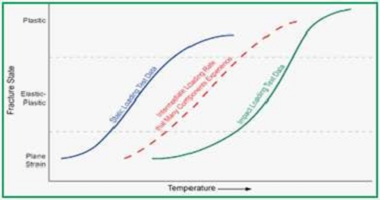
With these specimens and by varying the loading speed and the temperature, it is possible to generate curves such as those shown in the graph. Typically only static and impact testing is conducted but it should be recognized that many components in service see intermediate loading rates in the range of the dashed red line.


Bend Test:
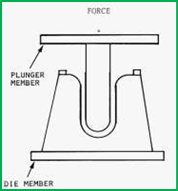
Free bend tests for ductility, use specimens similar to those for guided bend tests. Before the test, gage lines are inscribed across the width of the sample of deposited weld metal. A testing device is used to make the bend with the plunger removed, the specimen is placed across the shoulders of the jig with the weld centered.
The plunger is then forced down until the specimen is bent into a U shape. The specimen fails if it has cracks or other open defects greater than a specified number and size, or if its fractures.

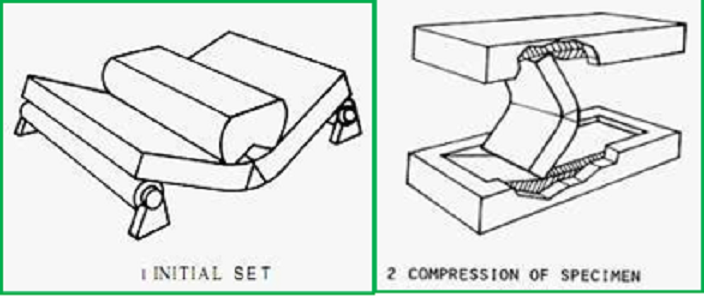
These lines mark off a distance about 1/8 inch less than the width of the weld. The sample is given an initial bend by supporting the ends or shoulders on rollers, then forcing the center down until the specimen takes a permanent set.
Compress Test:
A testing machine or device is used to compress the sample longitudinally until a crack or depression appears on the convex face of the specimen, or until the specimen is bent double.

The load is removed immediately if a defect appears before the specimen is bent double. Percent elongation is calculated from the initial and final distances between the gage marks.
Shear Test:
Shear tests of fillet welds are conducted by pulling specimens apart in a testing machine. Various types of impact tests are sometimes used to test the fracture toughness of the weld metal when low- alloy, high-strength steels are being welded. These tests measure the weld metal’s capability to resist crack propagation under low stress.
At AQC, https://aqcinspection.com/ our scientists, technicians, engineers and inspectors are highly experienced. Experts in fields such as automotive technology, mechanical tests and electrical engineering, material science (metallurgy and polymers), chemicals, non destructive testing and industrial forensics.
Our services range from conducting analyses on failed engineering components and resolving failure issues for medical devices to investigating the causes of boiler tube failure in power plants, explosions and water losses.
We discover why materials and polymers fail and troubleshoot contamination issues. Our failure investigation services can be used to help improve product quality for consumer and retail goods if a product fails or does not perform as expected.
Visit our technical and career updates at our Blog site https://advancedqualitycentre.blogspot.com . or


Comments
Post a Comment