Non Relevant Ultrasonic Indications
Non relevant Ultrasonic Indications can usually be identified as one of the following:
- Electrical Interference
- Interference form the transducer (search unit)
- Interference form the surface of the specimen
- Interference caused by mode conversion of the sound beam
- Interference caused by the shape of the specimen
- Interference caused by material structure
Electrical interference can be caused by improper electrical connections of sound energy from the interface between the wedge and test specimen surface.

In Immersion Testing, Air bubbles either on the transducer or specimen can cause reduced signal amplitude form the back surface and at times also from the front surface.
Surface Interface
A small amount of surface wave energy is usually transmitted in all directions around a transducer as shown below.
If the transducer is near the edge of a plate, a signal may appear on the CRT.
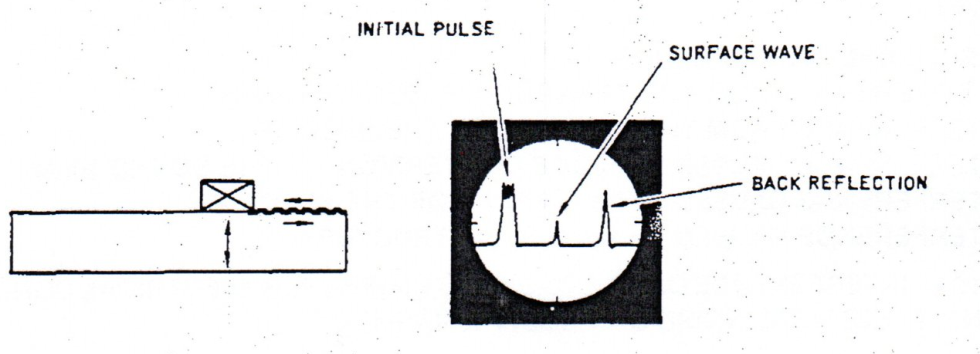
When inspecting with shear waves, it is possible to detect a surface discontinuity with the small amount of surface waves generated (see below).

You can determine if the reflection is from a surface wave by running your finger along the surface in front of the transducer.
If the reflection is due to surface waves, the amplitude of the pipe will drop on the CRT. When your finger is between the transducer and the interface producing the signal, surface wave indications may not be cause for rejection, but they should be evaluated.
Interference can be caused as a result of mode conversion in the test specimen as shown below.
However all of these reflections can be ignored as they will appear on the CRT after the first back reflection.
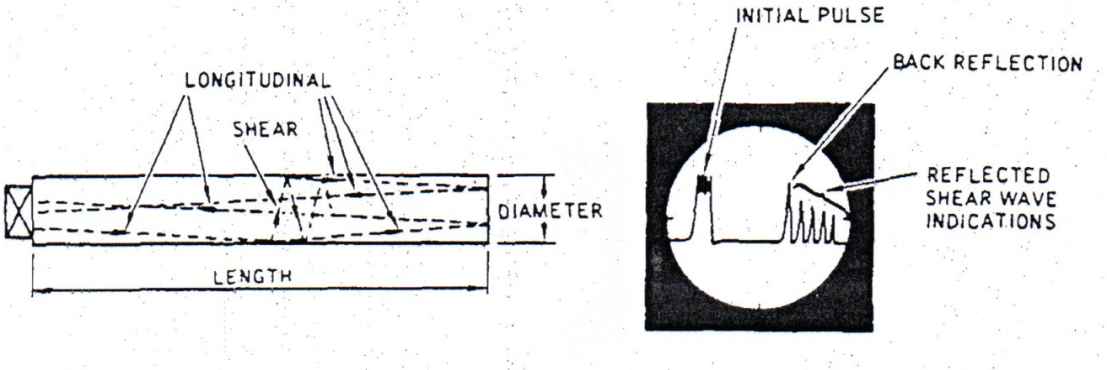
The shape of the specimen can cause false indications as shown below.
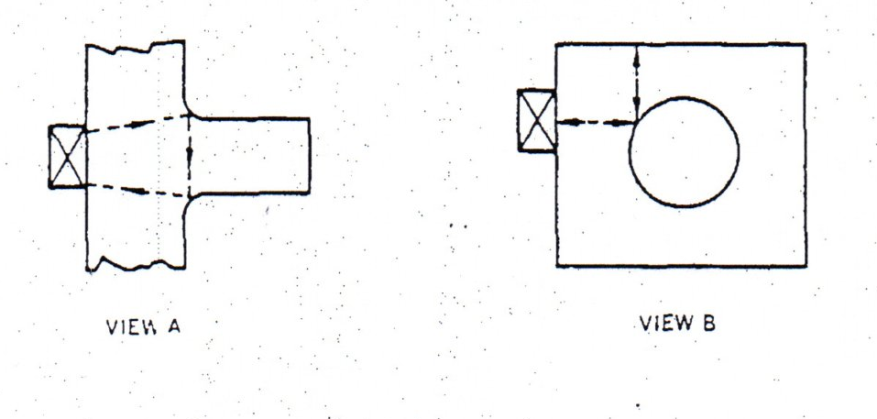
The Ultrasonic operator should always know the configuration of the part so that these false indications can be identified.
To verify a possible false indication, the operator should try to locate the discontinuity from a different location on the specimen.
A non-relevant indication may occur when using a transducer with a large beam spread as shown below.
This indication is easily identified as it is always behind the first back reflection of the part and would probably be continuous along the surface of the part.
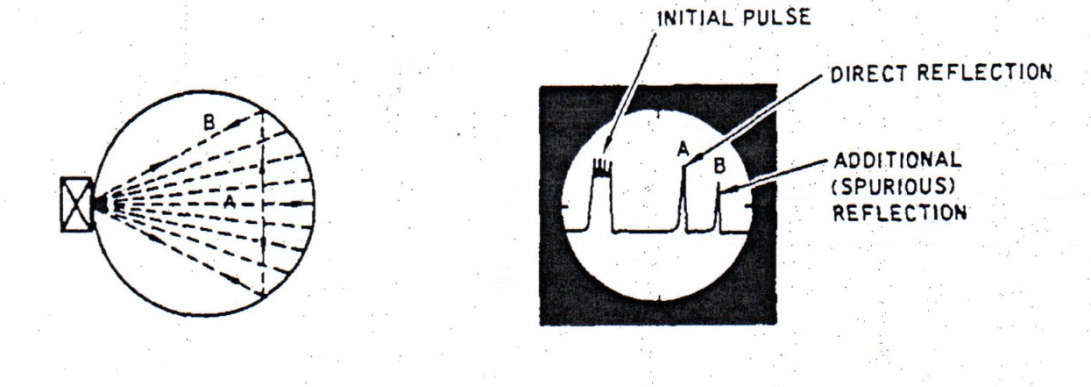
In the situation above, a plastic shoe machined to the diameter of the part usually reduces the excessive beam spread.
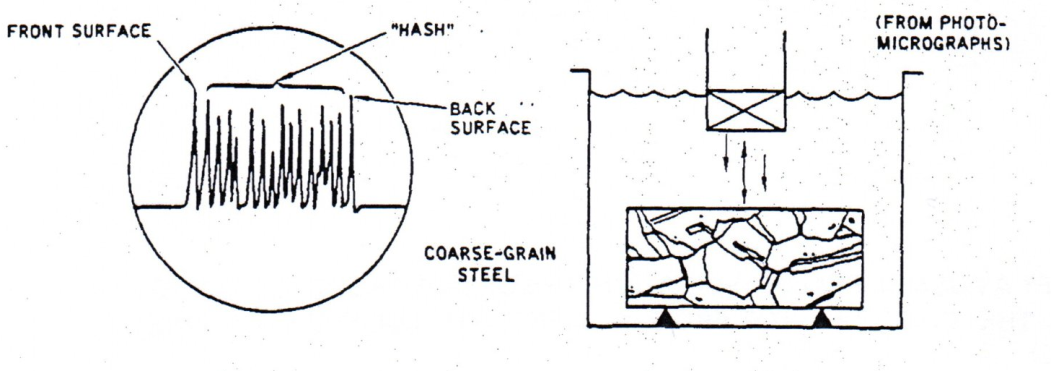
A large grain size may also cause “Noise” or “Hash” on the CRT screen. Abnormally large grains may result in total loss of back reflection. A lower examination frequency may help alleviate this problem.
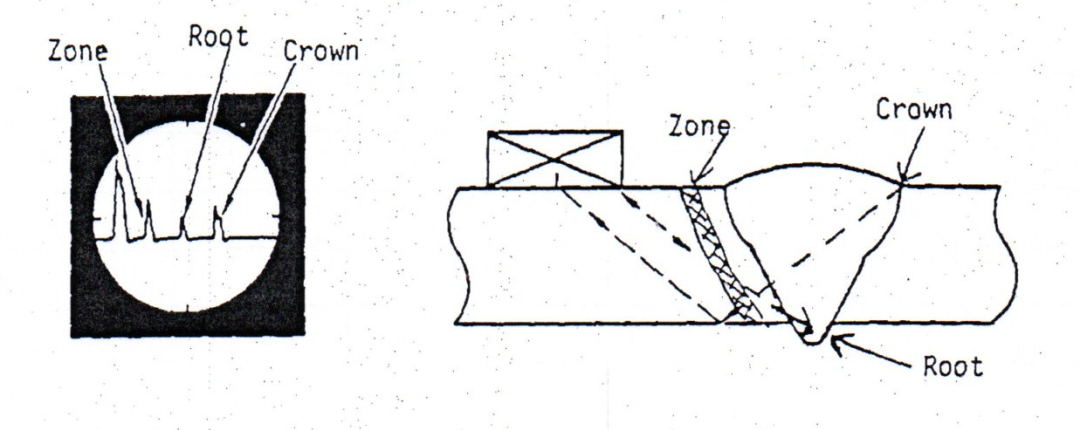
During weld inspection, non-relevant indications my result from reflections from the crown and the root of the weld and possibly from the heat affected zone.
Any indication on the CRT screen that is unusually consistent can be suspected as being non-relevant.
As is shown above, the reflection from the root and crown of the weld may appear for the entire length of the weld. If the non-relevant signal is coming from the crown of the weld, it can often be identified by placing your finger wet with couplant over the suspected area.
If the sound beam is striking the crown, it will be dampened by your finger, a surface examination, PT or MT, can be used to reduce the possibility of a surface crack causing the reflection.
For best Non destructive Testing Inspection services and other Material testing services in Coimbatore and NDT certification , QC training contact us at https://aqcinspection.com/
Visit our technical and career updates at our Blog site https://advancedqualitycentre.blogspot.com . https://ndtcenter.blogspot.com


Comments
Post a Comment