Posts

Showing posts from January, 2022

Concepts of Welding Defects and Discontinuities

Image
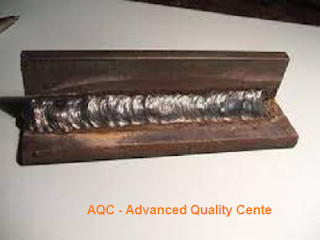
   Welding defects can be classified as structural discontinuities and consist of: porosity, slag inclusions, lack of fusion, cracks, etc. Porosity  is gas pockets or voids in the weld metal which are free of any solid materials, such as It is formed as a result of gases driven from the weld metal, excessive currents, excessive arc lengths, and improper preparation of the joint. Porosity is generally classified into different groups as follows:  scattered, clustered and linear .    Scattered porosity occurs throughout the weld metal and the voids may vary in size from microscopic to slightly over 1/8 in.(3 mm). (Figure 6, below);    Clustered porosity occurs in groups and may generally be associated with a change in welding conditions. (Figure 7, below);    Linear porosity occurs throughout the length of a weld and the voids are in a line with respect to the axis of the weld. This type of porosity generally comes in the root pass and usu...
WELDING PROCESSES

Image
  The welding processes are not the scope of this manual, specific for welding inspections. However, only for refreshing, the most common   arc welding processes  used in heavy and medium carbon  and alloy steel manufacturing are: SMAW:  Shielded Metal Arc Welding – stick welding electrode; GMAW : Gas Metal Arc Welding or MIG welding – solid wire or metal cored wire; GTAW : Gas Tungsten Arc Welding or TIG welding – rod or solid wire. SAW : Submerged Arc Welding – solid or tubular wire; FCAW : Flux Cored Arc Welding – gas-shielded flux cored wire; CAW : Carbon Arc Welding PAW : Plasma Arc Welding welding work types of welding processes The steels commonly used in plate manufacturing, metallic structures and piping systems are covered by the specifications of ASTM, AISI, ASME, SAE, and API.   The specifications often refer to the same types of steels, although  different restriction s on the chemical analysis and mechanical properties. Commonly the most ...

Fillet Weld Sizes as per AWS D1.1 & AWS D1.2

Image
  Fillet Weld Sizes as per AWS D1.1 & AWS D1.2 This blog here answers your questions about: What is the tolerance for Fillet weld sizes as per AWS D1.1 ? What is the weld size tolerance? What is the required fillet weld size for structures ? Selection of Fillet Size Acceptance criteria clauses for Weld Profile in AWS 7.23.1 Fillet Welds. The faces of fillet welds may be slightly   convex, flat, or slightly concave as shown in Figure 7.4 and as allowed by Tables 7.8, 7.9, 8.1 , and 10.15. Recommended weld profile in AWS Recommended weld profile Allowable reduction in throat Convexity Conclusion for AWS D1.1 Minimum size (leg length) of fillet weld to be achieved as per Table 7.7 , the same shall be in the drawing too. Under size of leg length is not acceptable, Throat thickness convexity acceptance criteria is from Table 7.9 Over size is not described in the standard, but can be mutually agreed between client and manufacturer through contract document, if not additiona...